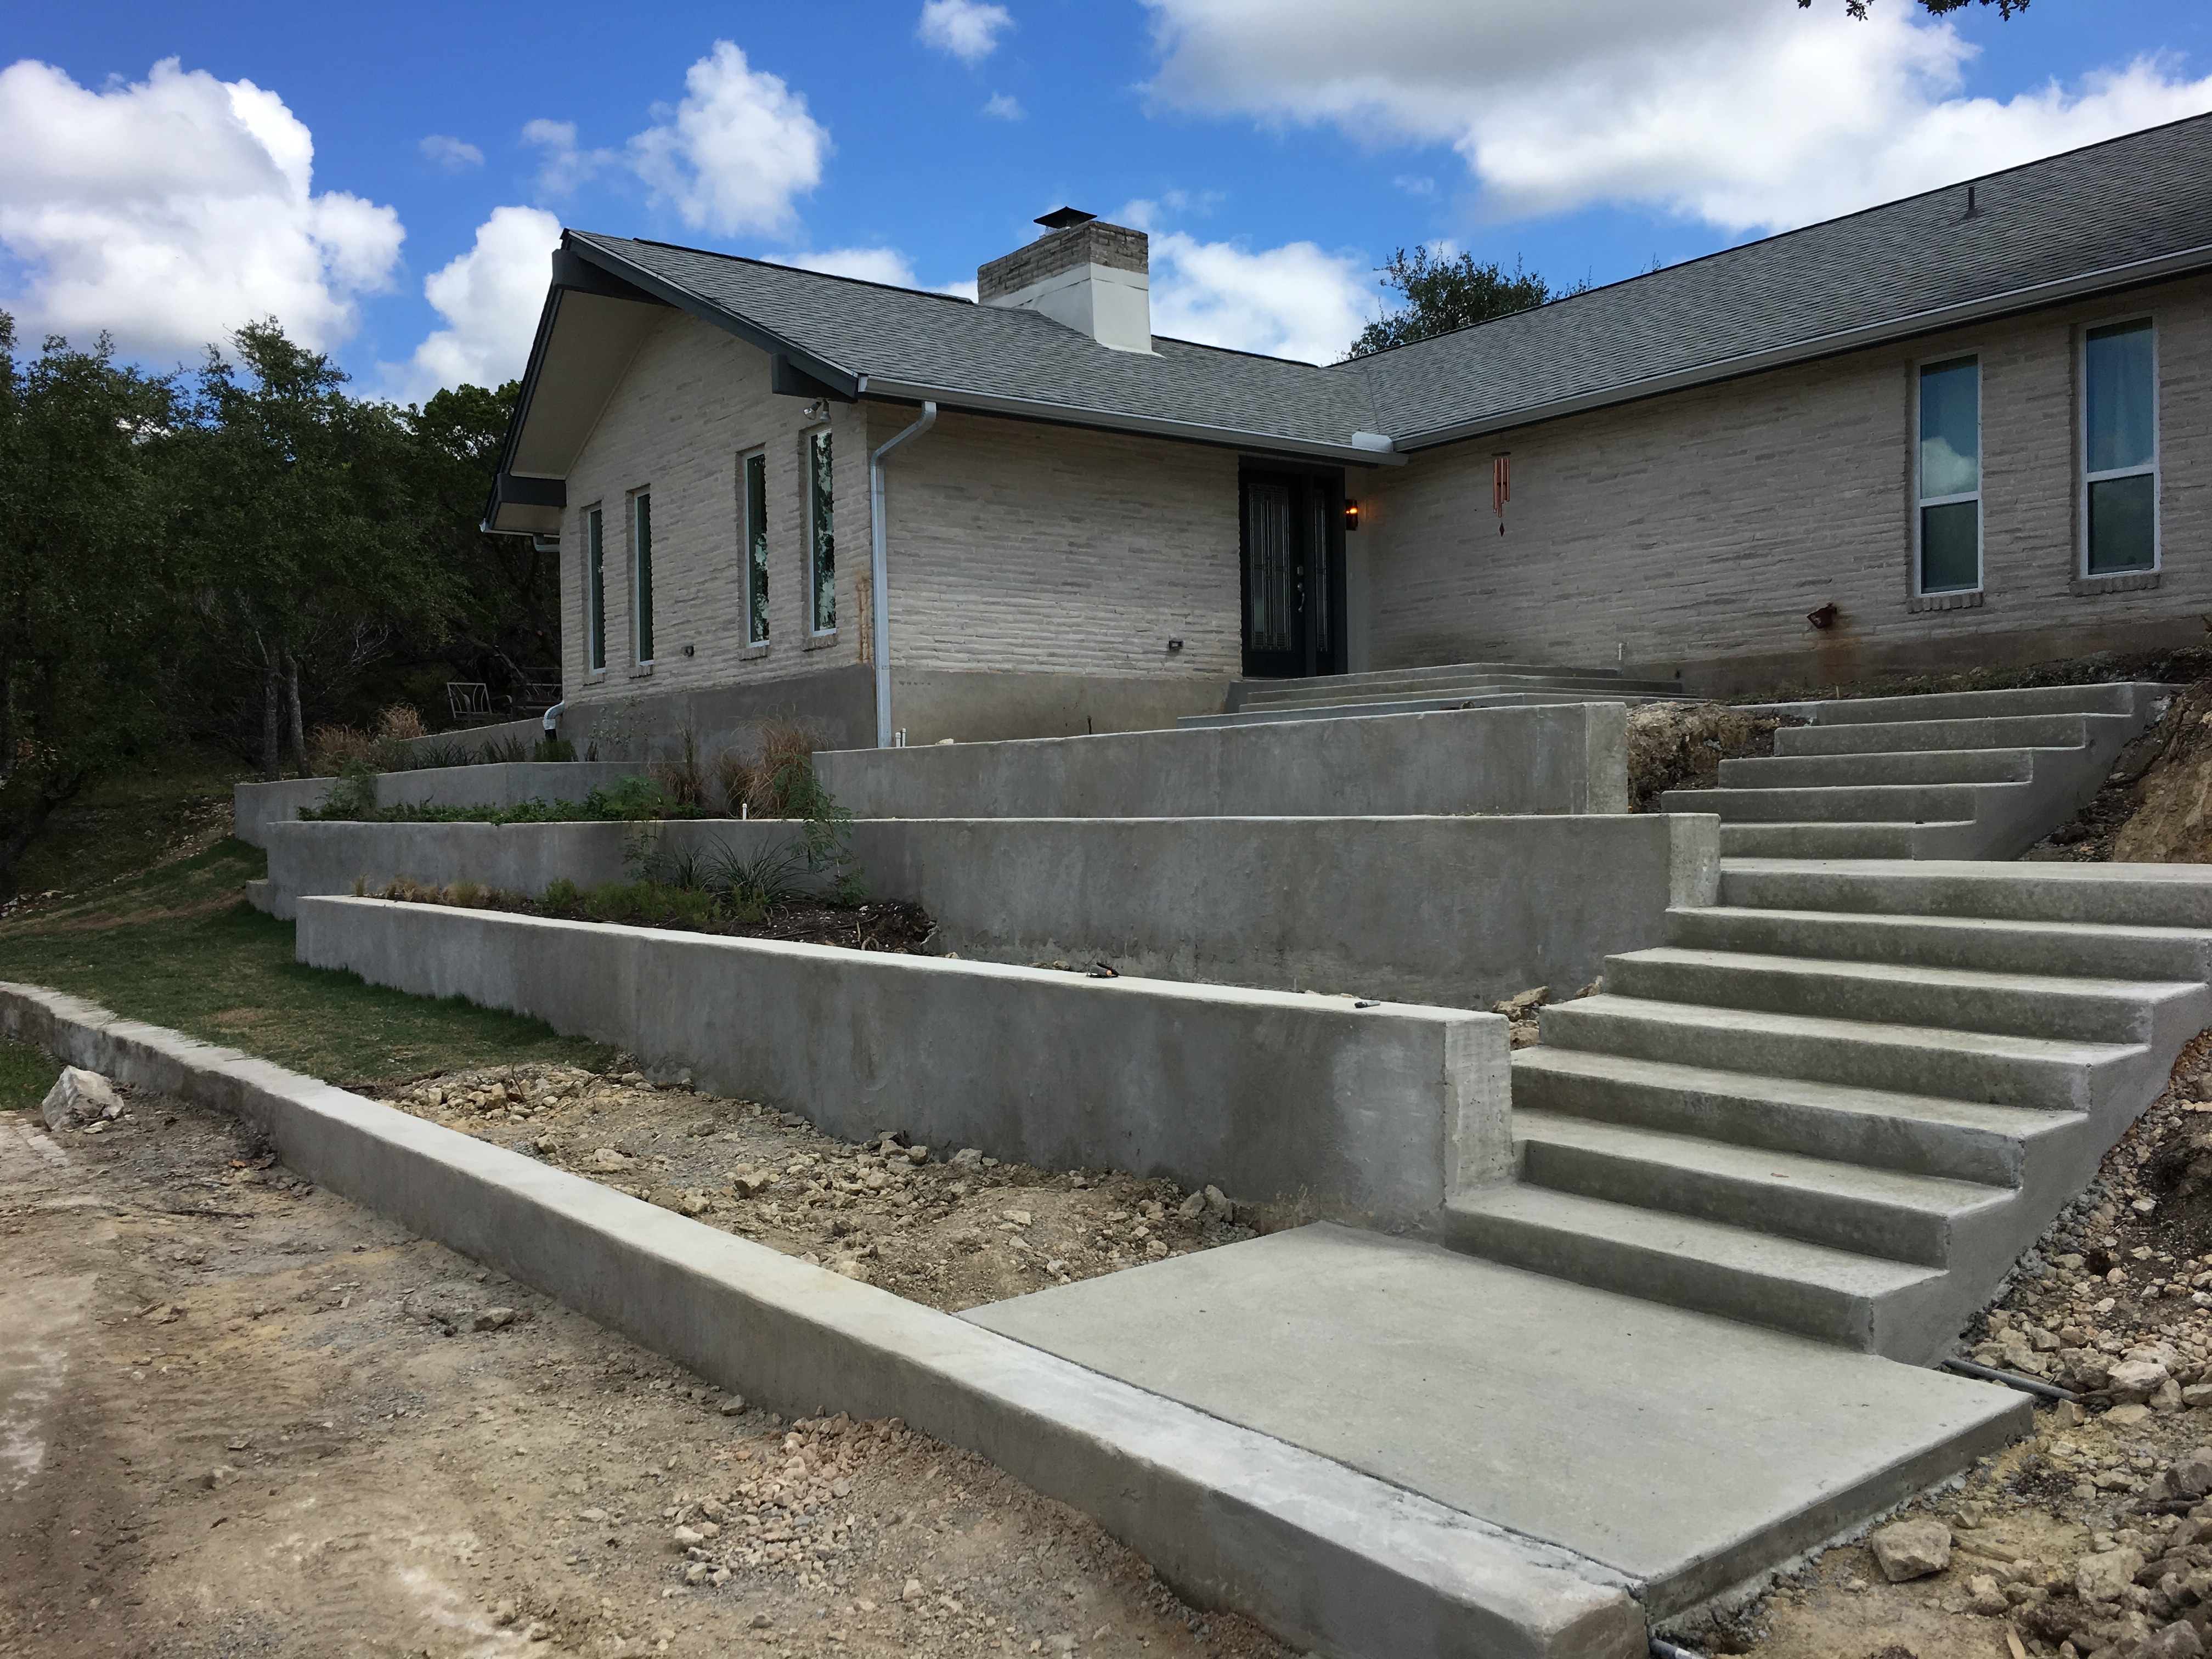
Residential project in Wimberley recently completed with concrete walls and
steps to create a modern and functional terrace in the front yard. The
landscaping will add more dimension and features to this home.

Residential project in Wimberley recently completed with concrete walls and
steps to create a modern and functional terrace in the front yard. The
landscaping will add more dimension and features to this home.
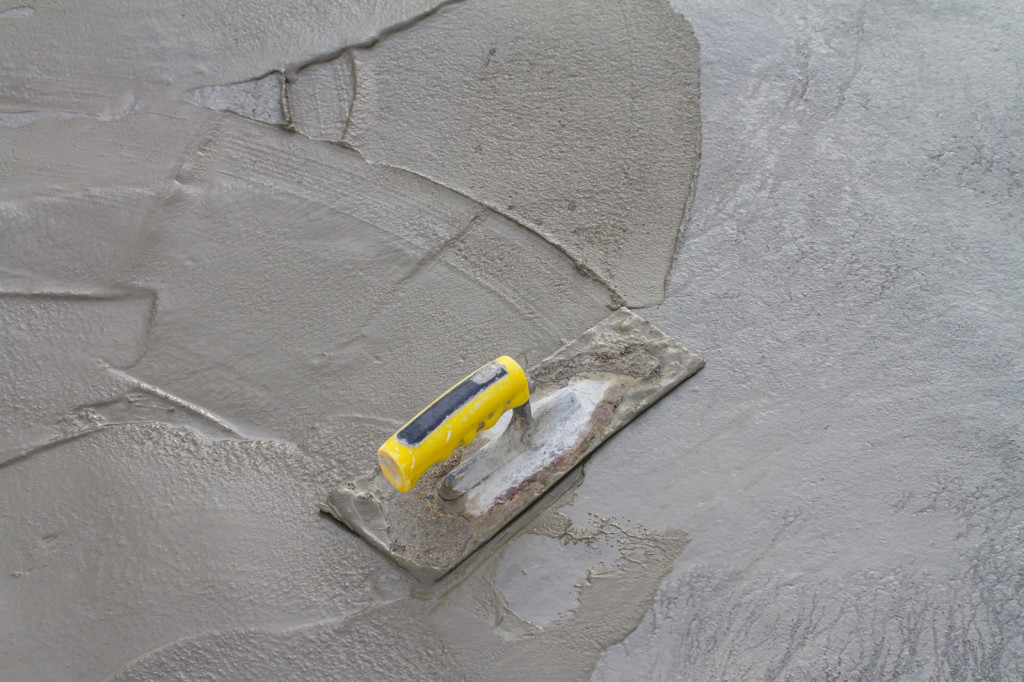
When a new home is built, the choice of foundation system used by the builders depends first and foremost on the condition of the soil. Shallow foundations are fine when they’re built on strong ground; poor soil may call for deeper foundations. Other factors play a role, too. Foundations can be designed to cope with conditions like frequent flooding or freezing temperatures. If you’re looking to build a home of your own, you can talk to a structural engineer to learn more about your foundation choices. We will go over the most common 4 examples of residential concrete foundations in this post.
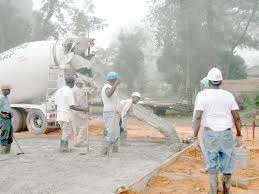 Foundation Type 1: Poured Concrete
This is the most common form of residential foundation used today. A concrete slab foundation is exactly what it sounds like: A level mat of concrete a few inches thick with deeper beams around the edges. This is usually placed on a bed of gravel to facilitate drainage. Pouring a concrete slab is fast and straightforward, and this type of foundation works well in climates that do not suffer from deep winter freezes. In most residential jobs, poured concrete foundations will receive a modicum of steel reinforcement to strengthen them.
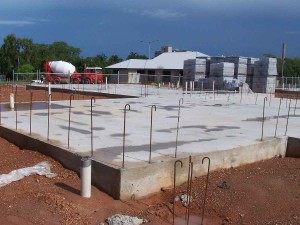 Foundation Type 2: Frost-Resistant Foundation
In cold climates like those mentioned just above, extra steps are taken to preserve the foundation from temperature extremes. Concrete footings are added to an ordinary slab foundation that extend below the limits of frost penetration. An alternative system is called the frost-protected shallow foundation, or FPSF. In this type of foundation, insulated concrete is used to create a typical slab foundation that will resist frost damage. Frost-protected shallow foundations are most common in the Nordic countries, with millions of examples to be found in Sweden, Norway, and Finland.
 Foundation Type 3: Permanent Wood
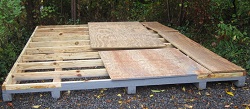
The technology to create durable, reliable foundations out of wood were perfected in the 60s. Wooden lumber and plywood is specially treated with preservatives to resist moisture and other forms of damage, resulting in a light-weight, high-strength foundation material that can be installed quickly and easily. As an added bonus, permanent wood foundations are easy to insulate, resulting in sub-surface living spaces (basements and crawlspaces) that are more useful. Permanent wood foundations have been used in over 300,000 US homes. Another common use of permanent wood foundations is for constructing sheds.
 Foundation Type 4: Raised Foundations
In coastal areas and other regions that are prone to flooding, raised foundations are the go-to solution. Raised foundations are designed to provide the support a home needs and also to resist moisture. They’re broken down into two main categories: stem wall and pier-and-beam. In both systems, the foundation rests on deep piers anchored in the soil. In pier-and-beam foundations, these piers support individual footings made of masonry which take the load of the home above. In a stem wall foundation, continuous masonry chain walls fill this role instead.
There you go. The most common types of residential concrete foundations. Each one has a specific application that will apply to your project based on the needs your region’s climate and building location impose on you. For help with your next concrete foundation project checkout our residential concrete services or our commercial concrete services or contact us today.
Questions about concrete foundations? Leave us a comment below 🙂
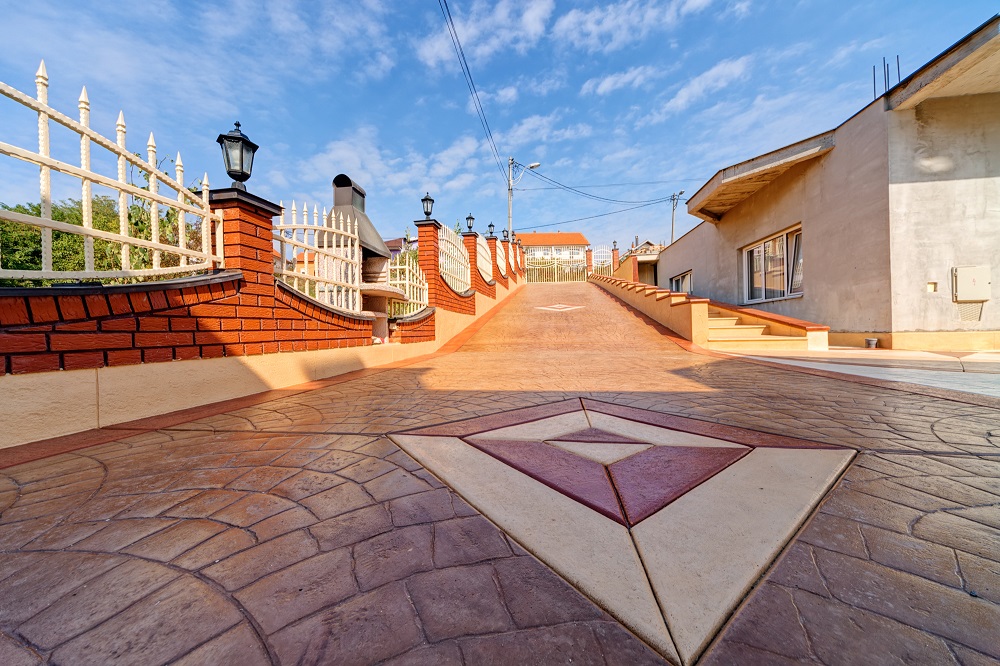
Many people think of a decorative concrete contractor as just another professional that needs to be scheduled to perform a job. Usually people want to spend as little as possible when hiring a decorative concrete contractor. However, installing this type of artistic concrete should not be taken lightly, as it’s a delicate process, and this is why planning for the construction component is so important.
In the past, decorative concrete didn’t come in many finishes, but today there are many finishes available, and some of these include textured, stamped and integral. Other finishes that the concrete is available in include coatings, diamond polish, stampable overlays, acid etch and dust-on. Self-level overlays, stencil, form liners, exposed aggregate and sandblast are other options available, and let’s not forget to mentioned that finishes can be combined with other types of finishes.
Here are a few examples of artistic finishes we offer for decorative concrete projects:
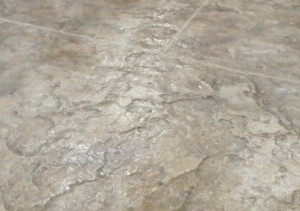
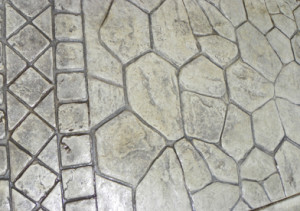
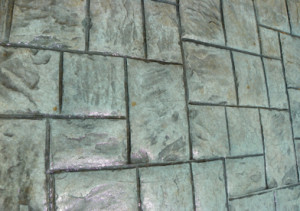
The creative possibilities are virtually endless, and is usually only limited to the contractor’s imagination, and creativity is one of the reasons why many people use decorative concrete. However, concrete is sensitive to many variables. This means the final outcome can be impacted in either a positive way or a negative way. So, for your next decorative concrete project focus on these 5 things for success.
The owner should provide a description of what the finished work should look like. This allows the contractor to figure out if it is possible and estimate the cost. A lot of people tend to have expectations that are not reasonable, and this is why it is best to discuss expectations as soon as possible.
Concrete that is decorative tends to not be structural, but sometimes people write specifications that make them look like it. A good example of this is if someone specifies that the concrete should be high compressive or flexural strengths. A contractor should focus on the decorative requirements primarily, because the structural requirements may be met, but the aesthetic requirements may not meet expectations.
Some decorative concrete contractors are more creative than others, and if you want creative work, then you need to find someone who has good crafting skills and one that can perform at the level you want them to perform at. You will need to do a bit of research to narrow down your choices because contractors tend to focus on one aspect of decorative concrete. Also, you might want to consider hiring a concrete contractor that provides place-and-finish, because some contractors don’t place-and-finish concrete, as some don’t know how to do it.
What this means is that you want to carefully schedule the installation of concrete with other trades in mind, because you don’t want the concrete slabs to become damaged before the decorative work starts or even afterwards. Plumbers have been known to do things such as spill liquids that stain on slabs, as well as spill hot solder and glue on the slabs. Some carpenters have been known for placing their belongings on it or stacks of lumber, and many trader workers can leave footprints on the slabs of concrete.
The key is to avoid unnecessary conflict. The way to do this is to have the work done on the weekend or start it on Friday afternoon and work through the weekend. This will reduce the chances of the concrete slab from becoming damaged as a result of other trade workers’ actions.
A lot of people think that concrete becomes stronger over a period of time, and then there is nothing left to do with it, but this isn’t the case at all. Concrete ages, and as it ages it becomes vulnerable due to chemistry changes, and water on the surface of the concrete can cause chemical changes and physical changes. It is extremely important that the finished work is protected, and this should be discussed before construction even begins.
Vapor from the concrete needs to be able to pass through, while not allowing products that stain to come in contact with the concrete’s surface, and this is exactly what covering material must allow. A concrete contractor is not going to wait around for the concrete to be cured, and this means the general contractor needs to protect the decorative work, but the subcontractor still has some responsibility. The subcontractor should be able to tell the general contractor what products they should use to protect the work, and they may be able to install them the first time.
Before construction begins, building teams should discuss a maintenance plan with their clients. There are a number of ways to seal the decorative work, with one of them being with an epoxy or even an acrylic finish is a good choice. It’s important for the finishes to be renewed, and you can find out when it should be renewed by looking at the manufacturer’s recommendation. Aside from that, the standard is that the concrete should not be walked on, as this would damage and ruin the sealer.
The owner may be interested in going for a natural concrete look, and not want a glossy appearance. If that’s the case, then there are plenty of penetrating sealers you can use, and these sealers are great because they restrict pore openings. This means that the surface won’t be penetrated by dirt and other materials that can leave stains.
Additional maintenance issues can arise with diamond-polished floors, and usually people want these types of floors to have a very high glossy shine, but the gloss on the surface can become dull over time. This is because of fine dirt, as well as fine grit that can become abrasive due to foot traffic. Maintenance programs are available at many big name retailers, and these programs include removing dirt and grit on a regular basis. Also, when food spills on these floors, which is often the case when they are installed in grocery stores, then the spillage needs to be cleaned as soon as it happens.
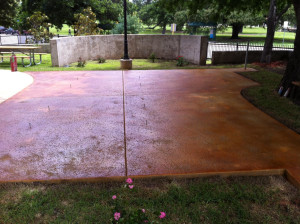
Are you planning a decorative concrete project? Checkout some of the decorative concrete projects that we have completed. Or give us a call at (512) 847-800 to talk with a concrete professional about your project. Or send us a little info on your project.
We just attended the Fall 2015 Construction & Concrete Industries Job & Internship Fair put on by Texas State. It was a lot of fun and we met some great students! A big thank you to Texas State Career Services and Jobs 4 Cats for putting on the awesome career expo!
Did you get a chance to stop by our booth? Charlene was there with some pretty awesome Myers Concrete swag!

We hope you stopped by and picked up some gear 🙂 and we hope to work with some of you awesome Bobcats in the near future. Follow us on Facebook and Twitter to keep up with new job opportunities at Myers Concrete and check our website news section for new job postings as well. You can always give us a call to inquire about job opportunities and you can reach us right here on our website.
Now back to pouring concrete 😉

If you love a project, build a house. It is the mother of all projects, and as with any big project there are lots of things to consider, review and coordinate. Believe me, it can feel endless and overwhelming. To help you make sense of it all, I’ve put together the list below.
If you are planning to build a house you will need a design. There are basically two routes to finding a good design. The first is to find an architect or designer that you like, the other is to shop for pre-drawn house plans online. Design is very personal and what works for your neighbor may not be right for you. Listen to your gut and find a designer or plan that feels like a fit. If it’s not a fit, you will likely always feel that something is out of whack.
As an architect I would like to say that everyone should hire an architect to design their home, but the truth is that hiring an architect may not be the right choice. If you are looking for something uniquely yours or have unusual site constraints, hire an architect. Otherwise, you might find that a pre-drawn plan will fit the bill or a plan drawn by a draftsperson will fit the bill.
Historically, pre-drawn plans have been what you might call “awful” from a design point of view. That’s changing though and I like to think it’s because architects are starting to get into the game. Historically, architects didn’t touch the pre-drawn plan/stock house plan market. Not only because the market was flooded with ugly, but because a house without a site isn’t a full design, and it’s seen as a kind of a taboo amongst architects. Some of us are getting over that.
It’s possible to design a home and not be an architect. Typically, someone like this might call themselves a home designer or a draftsperson. There are indeed some good and accomplished designers, but as you would with an architect – do your homework and interview them to see if you get along. It’s also a good idea to review past projects and talk to their clients.
In the southwest, we have a style that some of us who are more snarky refer to as ‘Taco Bell’. It’s like you imagine, a faux style that people from other parts of the country think should be built here because it’s “southwestern”. Unless you have money to burn, BEWARE of style! Just like fashion, it will go out of style. Look for solid design meant to last generations.
Whether your site is the middle of an urban neighborhood or in a rural area, make sure the location is right for you. This might seem obvious, but sometimes our heart decides before our head.
If your new home will be a second home out in the boonies away from all kinds of services and you will only be visiting on the weekends, that’s one thing. But, if your new home is far from everything, and it’s your year round home, it may be worth asking yourself if living an hour from groceries is for you. I’ve heard of people building dream homes and then selling within a few years because the lifestyle was better in their minds than in reality.
Do this: Hire a soils engineer, also called a geotechnical engineer. Just do it! It’s great insurance. Not only will you find out about the ground under your new home, you might even avert disaster. It’s also possible that you could save a little on foundation costs if your soils turn out to be exceptionally strong. Soils engineers can tell you not only about the strength of your soil but if your soil is freakishly weird and what kind of mitigation would be required to deal with that weirdness. Better to know upfront on this one, and yes, I speak from experience. No one ever said finding a river running under the site during excavation is a fun thing. Note: Soils can be unpredictable and a soils report = peace of mind.
Think of additional structures you may need and how they might fit on your site. A garage, shed, carport, playhouse, garden or pool will take space. Best to know what additional structures might be in your future so that you are sure you have enough room and can reserve a spot.
Like it or not your new home will be required to meet codes. The law of the land is the international residential code. It is issued in three year cycles, and your local jurisdiction may not be using the current version because of their own review cycle. I encourage you to build to the current version however, because eventually your jurisdiction will catch up and why be illegal sooner than you have to? Of course, you will be grandfathered in, but it’s important to recognize that the code is only a minimum standard. This is especially true with the energy code, it is probably the fastest moving target in the code update process right now. It’s wise to exceed the energy code by A LOT, it will mean a better built home and one that can be sold as code compliant in the future.
Before you do anything, visit your local building department. Find out what the zoning and code requirements are for your property. It’s also good to get to know the people in the department and don’t be afraid to ask questions. Generally, building officials aren’t nasty, they are just doing their job and it’s good to understand what their job is so that come permit time the sailing is as smooth as it can be.
Landscaping is one of the items that tends to fall to the bottom of the priority list because it can always be done later. When money is tight, as it often is in a building project, landscaping is usually the last thing on everyone’s mind. The fact is that landscaping can go a long way to helping your new house feel like a home. Getting plants in the ground, with irrigation if you need it, is the finishing touch to a project. If money is tight, consider starting with smaller plants, even if they look tiny today they will be bigger next year and the year after that. You may actually save money by growing them to the larger size you might otherwise have paid for.
Most of us would like to age gracefully and die at some far off date. We imagine living in our own homes and never having to move to a place that offers assistance. For some of us, that fantasy isn’t reality because most homes aren’t designed for aging in place. A home that is built for aging in place is easy to navigate and is in a location that makes the daily experience of living easy, or a least doable. Examples of easy navigation include a house without stairs, and doorways that are wide enough to let a wheelchair through. Things that are external to your home that make living easier might include being near a bus line or other forms of public transportation, being near shopping and entertainment, and having helpful neighbors. Simple things can make a big difference.
Houses come in all sizes from big McMansions to tiny little huts. Most of us don’t need or want either, rather it’s somewhere between. Of the two extremes, there is a lot to be said for building a smaller home. On the practical side it costs less to build smaller. That means that being a slave to the mortgage will end sooner and it might also allow you to buy that nicer lot that you’ve had your eye on.
Building a house is expensive. If you want a well built house, WHICH YOU SHOULD, plan to spend some bucks. Generally, I’ve seen two approaches on the money thing. One is the bleeding money approach and the other is the keeping it in check approach.
Typically the bleeding through the nose approach is characterized by Owners who haven’t done enough homework. This is usually people who aren’t clear about their budget and people who don’t understand the process. If you think you might be one of these people, I encourage you to dive into learning all that you can about the home building process, it’s the only way to really keep it in check.
You can hire a great team and tell them to keep it in check, which they will work hard to do, but ultimately it comes down to the decisions you as an Owner make. A lot of people are prone to boneheaded decisions when it comes to their home, putting money first into finishes rather than infrastructure. They don’t fully realize the implications or the costs of decisions and make fairly blind choices.

When it comes to the foundation of your home, mistakes and errors are a scary thing to think about. After all, repairs are extremely costly and extremely involved. Even worse, damage to your foundation is hard to spot, and by the time you notice it inside your home, that damage has become severe.
Thankfully, there are some simple guidelines to remember which can help you avoid the most common foundation mistakes. Even though the work needs to be done by professionals, it never hurts to be aware of the process and any potential missteps. If you see any mistakes being made, don’t hesitate to speak up. A good contractor will be glad you alerted them to an issue. It’s your home, after all, and you have every right to insist on proper installation. This is true with any home improvement project, but when you’re dealing with something as fundamental to your home’s structure as the foundation, only the best is acceptable.
In this article, we’ll explore the most commonly made mistakes during the installation of a new foundation. In order to save you time and money, we’ll also let you know how to avoid these expensive errors.
Failure to Waterproof
Waterproofing your foundation may be single most important factor in retaining its integrity. Most foundations are made of cement or concrete, which is extraordinarily durable but porous. This means that water can penetrate the foundation. Over time, water inside the foundation will contract and expand as it freezes. Even if you live in an area which does not experience regular freezing temperatures, water will still weaken and slowly break down your foundation.
Failure to waterproof your foundation is the biggest foundation mistake around, and it’s one that can cost you literally thousands in repairs. If water damage is left unchecked, it can destroy the foundation over time. In extremely severe cases, homes have been leveled because the foundation was unrepairable due to water damage.
If you’re constructing a new home, you’re ahead of the game. Tell your contractor that you want your foundation waterproofed. Be aware that some contractors will try to cut corners and save you money by using products which “damp proof” a foundation. Insist on waterproofing. In most cases, this will involve liquid rubber or other waterproof compounds which are applied to the finished foundation like paint.
If your home is already built but you know that the foundation was not waterproofed, don’t make the mistake of merely hoping that water damage won’t be an issue. Although it’s time consuming and tedious, start making plans to have your foundation dug out and waterproofed. It’s a small step in the big scheme of things, sealing your foundation against water for years to come.
Failure to Seal Inside Leaks
If your foundation was not waterproofed at the time of its installation, or if you live in an older home, you may have noticed cracks in your basement walls. Of course, these are only noticeable if your basement is unfinished and has no drywall in place.
Ignoring these cracks is another very common mistake, and just like failing to waterproof, it can be a very costly one. Allowing water to seep into your home, especially if your basement is finished, creates an ideal breeding ground for mold, mildew and fungus. If these conditions are allowed to continue, you will soon notice a musty smell in your basement. As time goes by, your household will be at risk for lung problems as a result of breathing in contaminated air.
Sealing leaks has its ups and downs. Yes, you’re preventing moisture from creeping further into your home. At the same time, however, you’re sealing that moisture inside the very foundation of your home.
In cases of water damage severe enough to be seen from the inside of your home, it’s best to call in an experienced contractor with knowledge of basements and foundations. They will advise you, based on a thorough inspection, whether sealing leaks is your best option, or whether you may be looking at a more costly repair.
Whatever the outcome may be, don’t make the mistake of simply ignoring basement leaks. They are a sign of water damage and can’t be ignored.
Pouring a Foundation in Inappropriate Weather
Concrete and cement are extremely durable materials. However, a big part of their eventual strength depends on being allowed to dry properly. Immediately after pouring, a cement or concrete foundation needs adequate time to dry. Your contractor will know the exact amount of time needed, since drying or curing times vary depending on the particular mix used.
Not giving a foundation adequate time to dry can lead to a host of problems. The foundation will settle, crack, sag and not be able to support as much weight as it would if it had been allowed to dry properly. This is one of the most grevious errors that can be made during the installation of a foundation. Talk to your contractor to ensure that their crew is experienced and knowledgeable.
In addition to inadequate drying time, other factors can cause a foundation to dry improperly. The biggest of these factors is the weather. Ideally, a foundation should be poured on a pleasant day with no threat of rain. Pouring a foundation during the winter months is not recommended. On a humid day, a foundation will most likely require more drying time due to the excess moisture in the air.
Scheduling your foundation for a pleasant time of year is all you can do, since nobody can control the weather. However, don’t make the mistake of asking your contractor to work on a rainy day. They know which conditions prevent proper drying, and ignoring their advice could cost you a great deal down the road.
Attempting to DIY
In today’s economy, it’s natural to want to save money. While there are a great deal of home improvement projects which can be done on a DIY basis, pouring a foundation is absolutely not one of them. The heavy equipment involved and the specialized product knowledge required make this a professionals-only undertaking.
If you are trying to save money on your home building project, ask your contractor if there are small jobs you can do. This might alleviate the need for a paid worker, at least for a few hours or a day. It doesn’t sound like much, but it’s all that an unskilled amateur can do without jeopardizing the entire project.
Failure to Keep Your Basement Dry
Once your foundation is properly poured and fully installed, your home will be built. Don’t make the mistake of thinking that your job is done! Properly maintaining your basement can go a long way toward keeping your foundation, and therefore the integrity of your entire house structure, solid and strong for many years to come.
Far too many homeowners neglect their basements. This is why so many of us associate a damp, musty, unpleasant smell with all basements. A basement doesn’t just naturally smell this way – that smell is a sign that moisture has penetrated the foundation and is allowing mold and mildew to flourish.
Proper basement care and maintenance begins as soon as your new home is finished. Controlling the moisture levels in this area of your home is easier than you may think. Since you’re constructing a new home, strongly consider having a moisture control element installed in your heating and cooling (HVAC) system. This type of automated moisture control is ideal. It allows you to set an acceptable and comfortable degree of moisture in the air. When the moisture levels rise above this pre-determined point, a dehumidifying element will draw moisture out of the air until the desired level is once again reached.
If you’ve already installed your HVAC system and it doesn’t include a climate control element, you can still avoid the mistake of a damp basement. Free standing dehumidifiers can be found at any home improvement or appliance store, and they are quite reliable. You’ll have to remember to change the drip pans regularly, especially when moisture levels are particularly high. However, this is a very small inconvenience when compared to structural foundation damage.
Keeping your basement comfortably dry won’t repair or prevent foundation leaks, but it can help to minimize the damage done by moisture once it reaches the interior of your home. Mold, mildew and fungus can’t grow without a certain level of moisture, which means that a dry basement is healthier for your entire household. Consult a contractor or other expert to determine what your next step should be if you notice water leaks inside your basement.
From the moment you begin planning a new construction, it’s important to keep your foundation in mind. With proper installation and maintenance, a good foundation will help to keep your home structurally sound for years to come.

Driveway paving is an important outdoor installation procedure, and if done right, will boost the attractiveness of your exterior home space. With the right guidelines and installation materials, you can have your driveway paved with a minimum of labor and time. The following are some of the common mistakes made when paving a driveway. Read on to find out how to avoid these pitfalls, and how to succeed in paving your driveway.
While it is a good idea to make some allowance for extra space in parking, leaving too much space will only serve to inconvenience you in the future. Consult a professional so that you can be certain to avoid allocating too much space for the driveway.
When too much of the front open space is taken up by the driveway, it has the effect of creating an unbalanced setting. It leaves the impression of something not being quite right. Even if you do have the space to spare, don’t let it all be consumed by the driveway. You’re sure to achieve a more balanced setting if you devote some of the extra space to landscaping. A good pointer in figuring out just how much space you need is to construct a driveway that will comfortably accommodate your personal vehicles.
The particular design of your driveway will dictate how much space you should allocate for construction. It’s important to allow enough space to enable comfortable maneuvering and parking. Again, it pays to seek professional advice to ensure that you make the most resourceful utilization of your space while achieving the driveway of your preference.
A driveway is the sort of installation you don’t want to have to redo in the near future. Give careful consideration when installing, so that the outcome can serve you several years before you have to renovate it. Don’t be driven simply by the costs involved when you want to pave a driveway. What may come across as a cheaper option might not hold long-term value and appeal for you. The cheapest is not always the best. Don’t be focused on installing a driveway that will take only the shortest amount of time to install. A hastily installed driveway can make it impossible for you to incorporate certain aesthetic and functional aspects, which you may only come to appreciate much later.
A sealer protects the driveway from the damaging effects of weather and other destabilizing agents. Not sealing properly is a common mistake, especially with an asphalt driveway. Applying a sealer too soon, or waiting too long before applying, will have a negative impact on the strength and durability of the driveway. It’s best to apply a sealer 6 months after installation. After that, you need to apply the sealer every 1 to 3 years.
Myers Concrete is doing various concrete work under General Contractor Vaughn Construction on the renovations to Jones Dining Hall. This dining hall has been in service to students since the 1970’s and is due for updating. Myers Concrete will be doing flatwork, sidewalks, stairs and various access to the dining hall. For more information visit…
Nestled in the beautiful hill country in Wimberley, TX we are able to serve many communities throughout central TX.
We'd love to hear about your upcoming project. Tell us all about it by filling out our contact form. Or, give us a call at +1 512 847 8000